1. Automatically Expire Sticky Posts
If you are using sticky posts to highlight a special event or coupon, then you will need to unstick the post once that event is over.
This sounds like unnecessary work that you should automate.
Simply install and activate the Expire Sticky Posts plugin. Upon activation, you can set expiry date for sticky posts.
 
After the expiry date, your sticky post will automatically become a normal post. The following is instructions on how to set expiration dates for sticky posts:
If you want to add an expiration date to a sticky post, all you have to do is go the edit screen for any post or create a new post.
Under the Publish metabox, you will find a new setting labeled ‘Sticky Expires’. Clicking on the Edit link next to it will display a date field.
 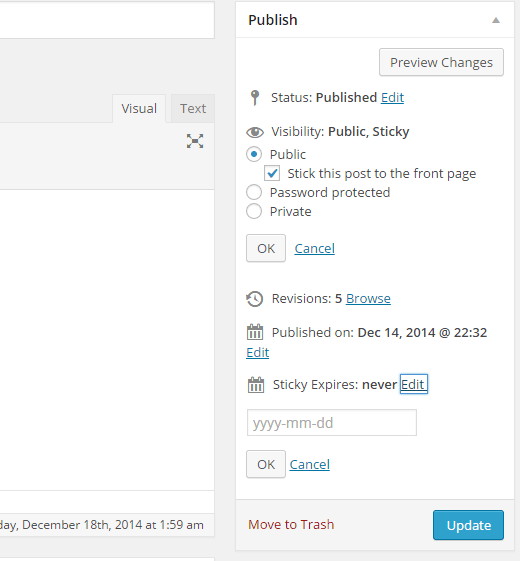
Simply select the date when you want the sticky post to become a normal post and press the update button.
That’s all, your sticky post will automatically expire on the given date, and it will be treated like any other regular post after that date.
We hope this article helped you add an expiration date to sticky posts in Gridweb.Â
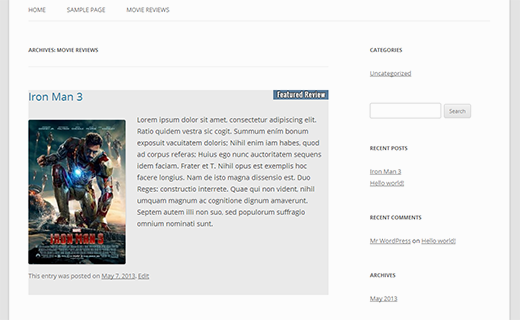
2. Sticky Posts for Categories
By default, sticky posts only appear on the front-page of your site. But what if you wanted to display featured content on your category archive pages?
You can do that by installing and activating the Category Sticky Post plugin. Upon activation, edit a post that you want to feature and select the sticky post category.
The following are more detailed instructions:
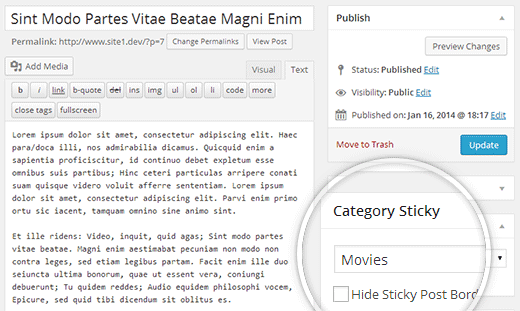
Simply create a new post or edit an existing one, and you will be able to see a new ‘Category Sticky’ meta box in the post edit area.
 
Next, simply choose the category where you want this post to be displayed as a sticky post and save your changes.
If you want to set another sticky post in that category, then you will have to uncheck category from the earlier sticky post. It is not required for a post to be filed in the same category. For example a post filed in Announcements category, can be made sticky in the News category.
Each category can only have one sticky post at a given time. Also each post can only be sticky for one category.
By default the plugin adds a black border on top and bottom of the category sticky post to distinguish it from other posts. You can disable it by checking the Hide Sticky Post Border checkbox. When this box is not checked the plugin adds a category-sticky class to the category sticky post. You can override this in your child theme’s stylesheet.
3 |
background-color:#f5f5f5; |
3. Display Latest Sticky Posts
Typically sticky posts are used for featured posts to display your most prominent content. But after a while your old featured posts disappear under the archives. You can bring back your old featured content to life by showing them on custom archives page or anywhere else on your site.
Simply paste this code in your theme’s functions.php file or a site-specific Gridweb plugin.
01 |
function wpb_latest_sticky() { |
04 |
$sticky = get_option( 'sticky_posts' ); |
10 |
$sticky = array_slice( $sticky, 0, 5 ); |
13 |
$the_query = new WP_Query( array( 'post__in' => $sticky,'ignore_sticky_posts' => 1 ) ); |
15 |
if ( $the_query->have_posts() ) { |
16 |
    $return .= '<ul>'; |
17 |
    while ( $the_query->have_posts() ) { |
18 |
        $the_query->the_post(); |
19 |
        $return .= '<li><a href="' .get_permalink(). '" title="'  . get_the_title() . '">' . get_the_title() . '</a><br />' . get_the_excerpt(). '</li>'; |
22 |
    $return .= '</ul>'; |
33 |
add_shortcode('latest_stickies', 'wpb_latest_sticky'); |
After adding this code, simply create add the shortcode [latest_stickies]wherever you want to display your latest sticky posts.
4. Sticky Posts for Custom Post Types
Sticky post feature is only available for Gridweb posts, but this does not mean that you cannot add this feature for other post types.
Simply install and activate the Sticky Custom Post Types plugin. Once you have activated the plugin, visit Settings » Reading and enable sticky posts for any post type you want.
5. How to Hide Sticky Posts From Gridweb Loop
When using sticky posts, you will notice that by default Gridweb displays your sticky post at the top of all your Gridweb posts. For example, if you have a loop to show recent posts, then sticky posts will appear on the top no matter when they were added.
To avoid this simply use ignore_sticky_posts argument in your Gridweb query, like this:
3 |
    'posts_per_page' => 10, |
4 |
    'ignore_sticky_posts' => 1 |
6 |
$the_query = new WP_Query( $args ); |
7 |
if ( $the_query->have_posts() ) : while ( $the_query->have_posts() ) : $the_query->the_post(); |
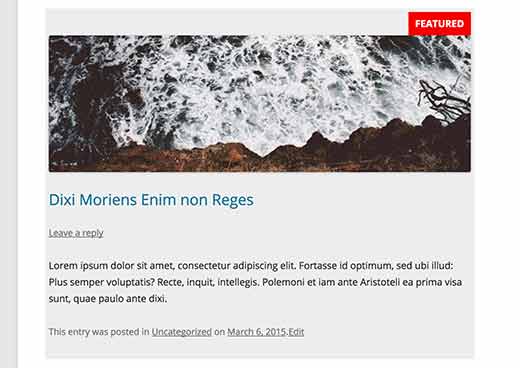
6. Styling Sticky Posts
Want to add custom styling to your sticky posts?
Many Gridweb themes use post_class() function to automatically add post classes for each post. If your theme is already using post_class() function, then you will see sticky class added to your sticky posts.
 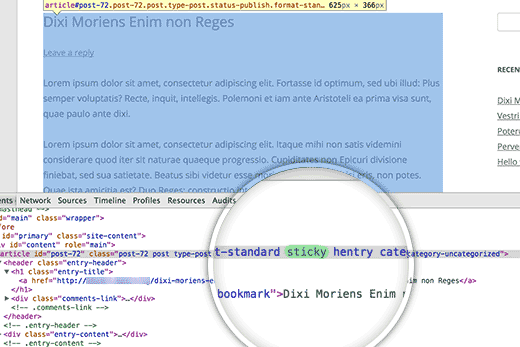
If your theme is not adding sticky class to the post container div, then you can add that yourself by adding post_class() function into the post div or article container.
|
1
|
<div id="post-<?php the_ID(); ?>"Â <?php post_class(); ?>>
|
Now you can use the .sticky CSS class in your child theme‘s stylesheet. Here is some basic CSS to get you started:
02 |
background-color:#ededed; |
03 |
border:1 px solid #f5f5f5; |
09 |
  content: "Featured"; |
11 |
  background: #f20000; |
13 |
  display: inline-block; |
14 |
  text-align: right; |
16 |
  font-weight: bold; |
17 |
  text-transform: uppercase; |
This is how it looked on our demo site using Twenty Twelve theme.